Pros: Construction
Cons: None
When You Care Enough to Send the Very Best
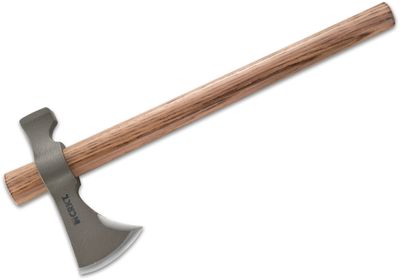
As a wood processing tool, the CRKT Woods Chogan is just, alright. It will chop and split, but there are many axes/hatchets out there (Hults Bruk, Cold Steel, Condor Tool & Knife) with heads designed just for chopping wood that will perform better. I even found a nice Swiss Military Surplus Small Swiss Axe, for under $20, at KnifeCenter.com that I would wager would chop wood better by design. As a mid-18th century tactical weapon for close quarter combat in the forests of Northeastern United States, this ‘hawk really shines. >>>>>>>>>>>>>>> I took it out in the back yard and put it through the paces. I chopped and split some well seasoned split white oak into kindling. I’d say it performed the tasks better than most of my tomahawks, but not as well as any of my axes and hatchets. If this is what you had, it will work. >>>>>>>>>>>>>>>>>> Next, I threw it at, “Mack the Knife Throwing Target.” I never hit Mack, but I planted it in the tree behind the target on my third throw. Seems like a good throwing ‘hawk. I stopped before the neighbors called the police about the crazy man. The irritating thing is, that when it fails to lodge in a target, and grazes/bounces off, the head detaches from the handle, sometimes flying off dangerously. A friend who does 1812 re-enactment suggested wrapping fine copper wire under the head. That may do the trick. I’m sure there is a common cure; I’m just ignorant of it. >>>>>>>>>>>>>>>>>> I’ve seen the sheath available from CRKT for this thing. Do you really want to undo 3 snaps to get at your tomahawk? You can make a nice one strap quick release, drop-out-the-bottom, leather/copper rivet sheath (lazy man sheath, no stitching) using the black guard/packaging that comes with the Chogan, as a sheath liner. Cut off the bottom tabs, except the one holding the hammer end (this will be retention/pivot point). Trim back the front guard so blade can swing clear as it drops out with hammer in retention on pivot point/hammer shelf. Next, trim a notch in the plastic so a retention strap will hug the blade snugly at the heel (blade bit side, see axe anatomy), just forward of the handle. This is now the sheath liner, and the pattern for your leather. Add half of the depth of the ‘hawk, plus 5/8” for the rivets/contact cement to the outside dimension on 3 sides (not the bottom). Add ¾” forward of furthest ark of blade edge so it clears freely as it swings from retention (critical). Include 2 straps from front top, going around to the back for belt retention, and one strap from back, to front, for ‘hawk retention. I usually make cardboard pattern from cereal box, cut separate cardboard straps, and adjust, then tape them in place with ‘hawk inside the pattern. I used 24 line Pull-Dot snaps on the belt straps (won’t yield to belt pressure, only when straps pulled from bottom), and a regular 24 line snap for ‘hawk retention/quick release strap. Punch holes for rivets about every 1”- 1.5” on 3 sides. Contact cement liner to one side of leather (I riveted mine in 2 of the holes in liner for added security). Place hawk in liner, and contact cement edges of leather on 3 sides. Place two sides together, aligning punched holes. Set copper rivets, alternating hammer side, blade bit side, then do top edge rivets last. It’s a useful, ruggedly handsome sheath, with more bling than a rapper on a Las Vegas holiday. >>>>>>>>>>>>>>>>> Well, I can see I’m going to have fun quick drawing this ‘hawk, and playing Roger’s Rangers in the backyard, until the trip to the emergency room, when my wife takes it away from me. Don’t try this at home, kiddies.
 (21 reviews)

